Docker For Azure
Microsoft Azure is a cloud computing platform created by Microsoft for building, testing, deploying, and managing applications. It is currently the second most popular cloud platform behind Amazon. In this recipe, we will discuss how to install Docker for Azure, a product from Docker that makes it easy to get a Docker native stack up and running on Azure.
Getting ready
Before we can get started, there are a few things you will need:
-
Access to a Microsoft Azure account with admin privileges
-
An SSH key, which you will use when accessing the Docker for Azure Manager nodes
-
An Azure Service Principal ( SP ), which is used by Docker for Azure to authenticate with the Azure APIs
Docker has made it easy to create a Service Principal by using a Docker image they provide. Follow these steps to create a Service Principal. The first thing you will do is run the Docker image, passing in a few parameters:
$ docker container run -ti docker4x/create-sp-azure [sp-name] [rg-name rg-region]-
sp-name: The name of the service principal (for example,sp1). -
rg-name: The name of a new resource group, which will be used when deploying Docker for Azure (for example,swarm1). -
re-region: The name of the Azure region where the resource group will be created (for example,eastus). For a full list of available regions, go to the following page: https://azure.microsoft.com/en-us/global-infrastructure/regions/:
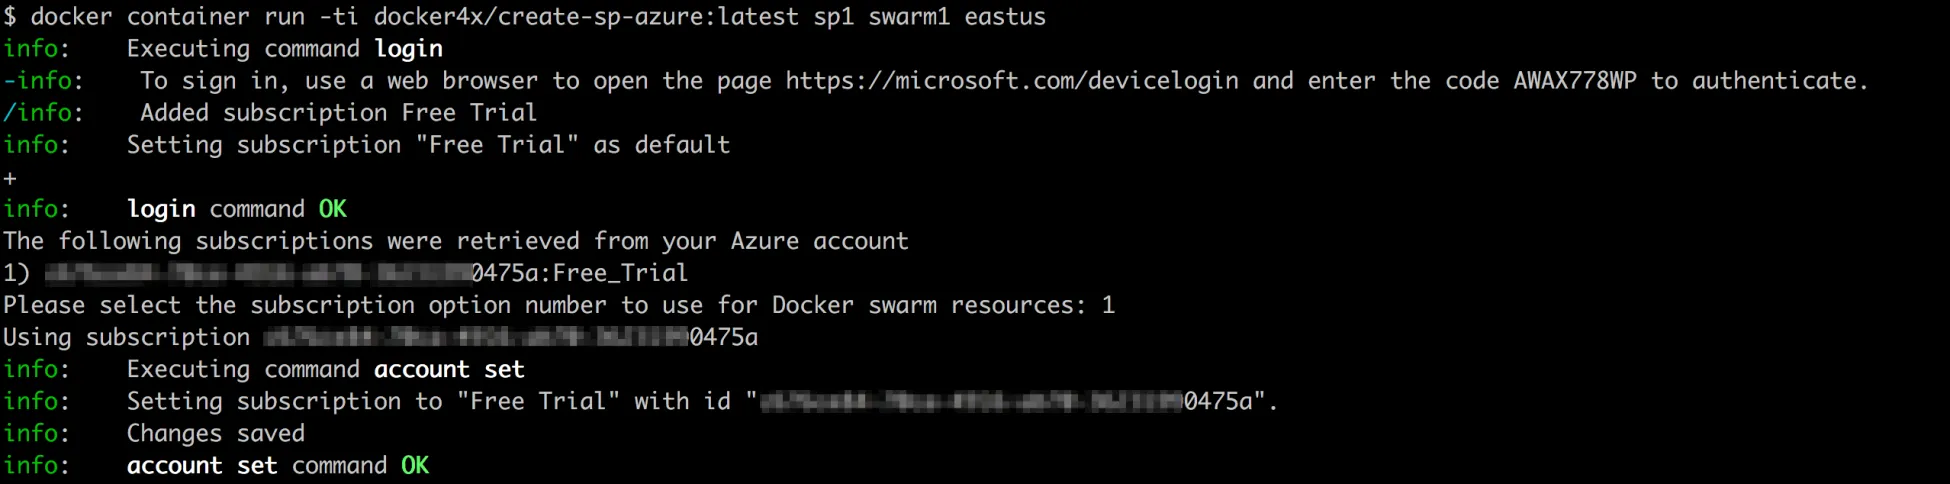
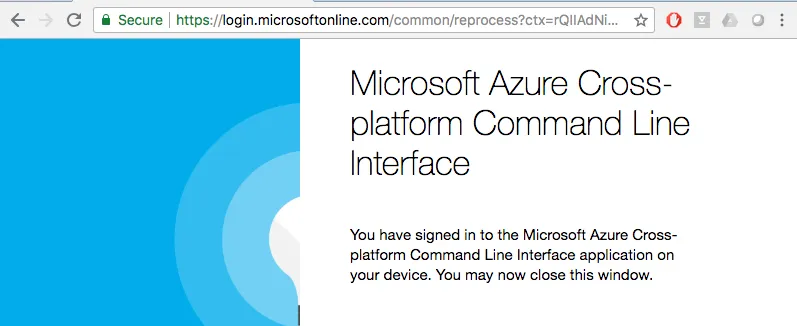
It will then ask you to visit a web page and enter a code to authenticate. This will verify your account and link it to the Docker container, which will let it complete the creation of the Service Principal:
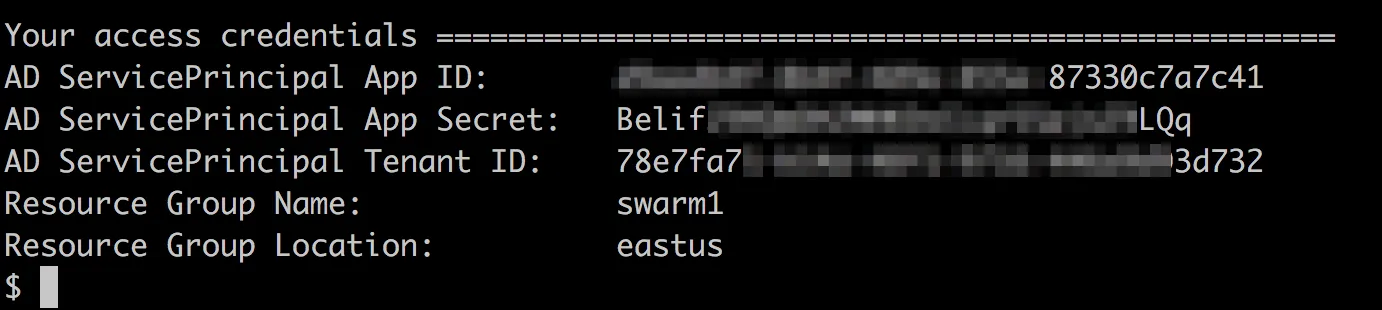
When complete, you should see your Service Principal credentials. Save this information in a safe place; you will need it in a minute:
How to do it…
Docker for Azure uses the Azure Resource Manager (ARM) to create all of the required resources tha
Open the following web page and select the Stable channel version: https://docs.docker.com/docker-for-azure/:
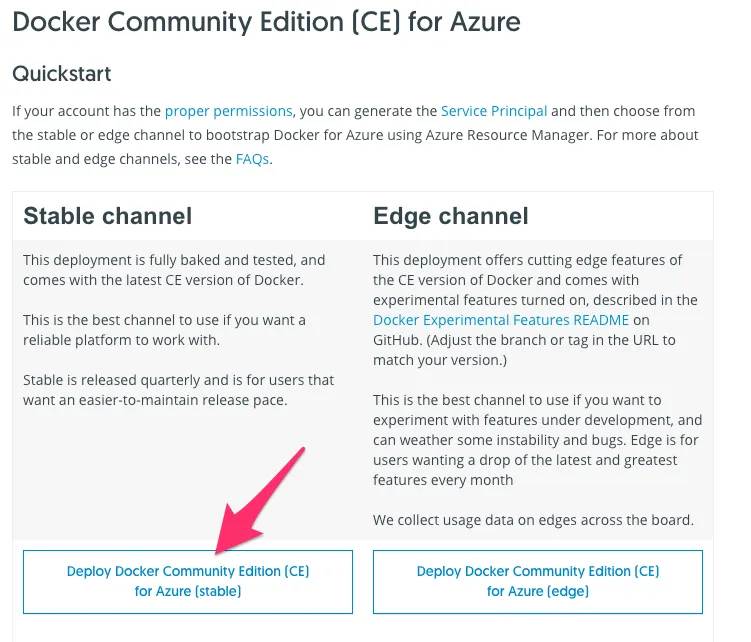
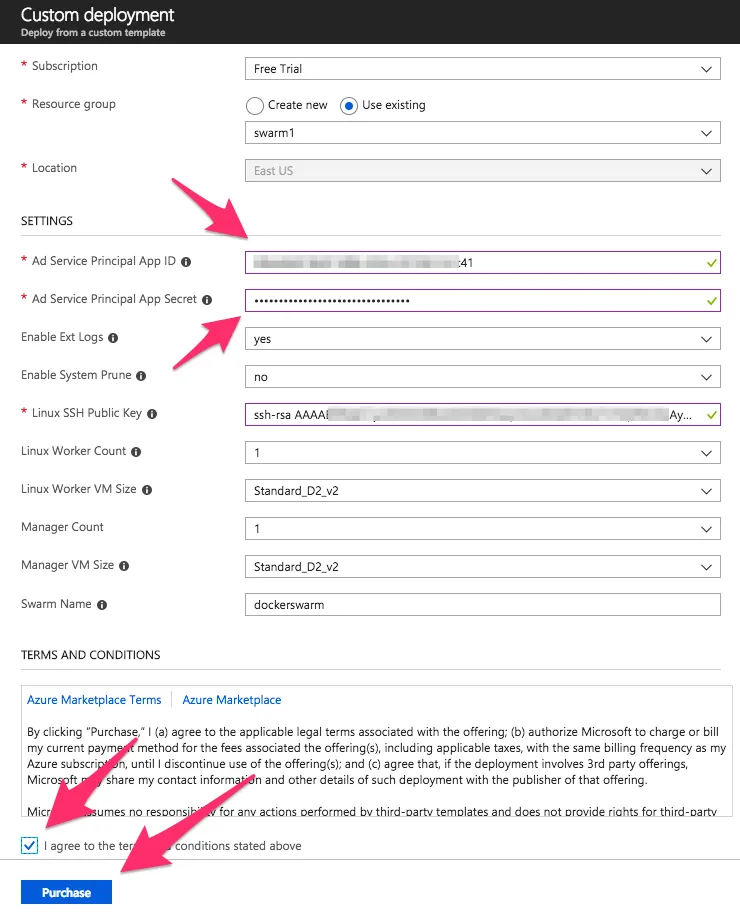
This will take you to the Azure portal and start a custom deployment using the Docker for Azure ARM template. Add the Service Principal credentials that you have from before, and answer the other questions. Don’t forget to include your SSH public key. When the form is complete, select the I agree… checkbox and click on the Purchase button:
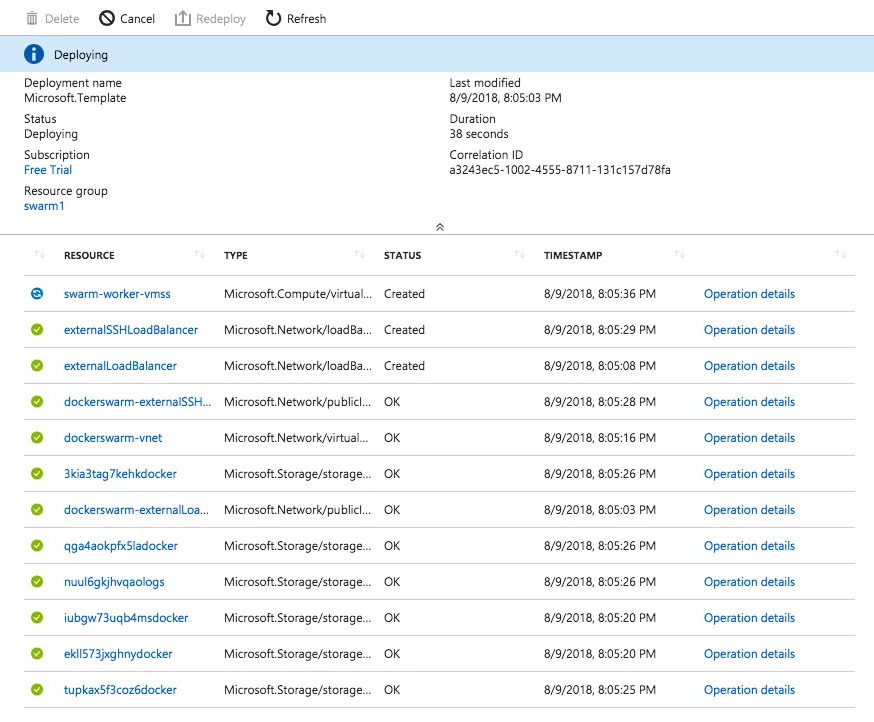
This will start creating the resources you need and show you the progress of the deployment:
When it is finished, click on the Outputs tab and make note of the three outputs. You will need these a little later. Copy the value for SSH TARGETS and open the URL in a new browser window:
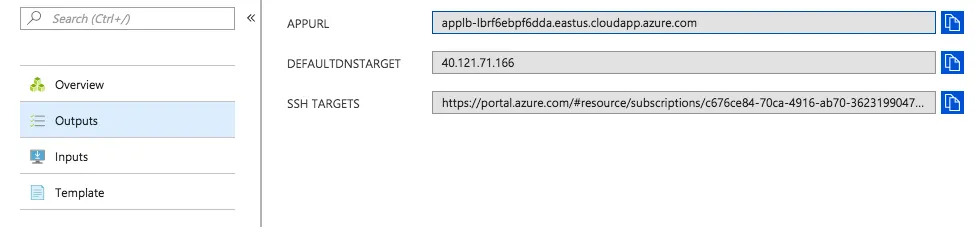
This is the list of Manager nodes that are in your Swarm. To connect to this node, we can SSH to the destination IP address on the Custom TCP port:

Using that information, let’s SSH into that Manager and make sure it is working correctly by listing the nodes in the Swarm:
$ ssh -p 50000 docker@40.76.49.102
$ docker node ls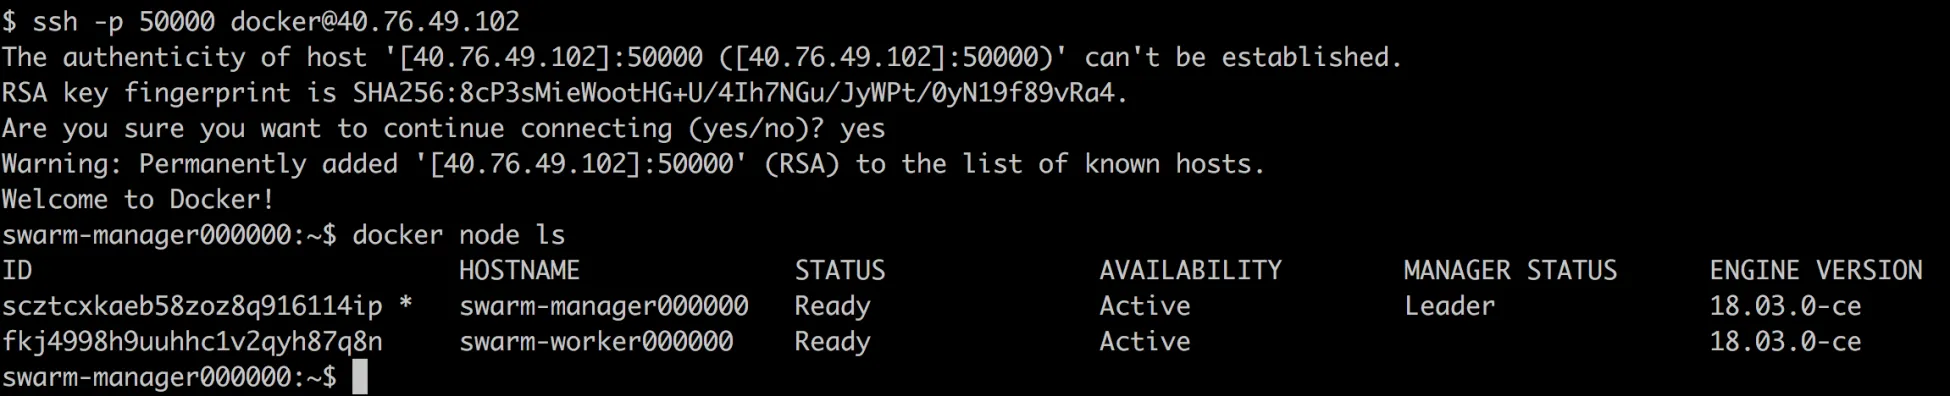
If everything is working correctly, you should see the list of all of your manager and worker nodes with a Status of Ready .
NOTE
When you SSH into the swarm manager, you are not actually logging into the Azure host directly, you are logging into a special SSH container that is running on that host.
How it works…
Docker for Azure has an Azure Resource Manager ( ARM ) template that, when applied, will create all the required resources on Azure and configure them together to create the Swarm cluster. Docker for Azure uses the Service Principal to make the required API calls to configure all of the nodes, as well as to manage the cluster once it is up and running.
There’s more…
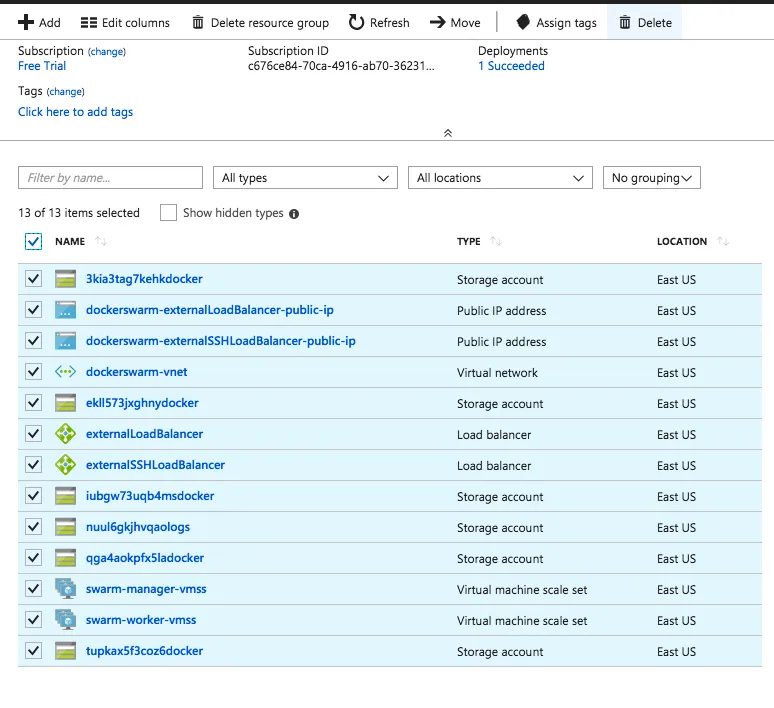
When the time comes to remove Docker for Azure, you will need to go into the Azure portal, find the deployment, select all of the resources, and delete them:
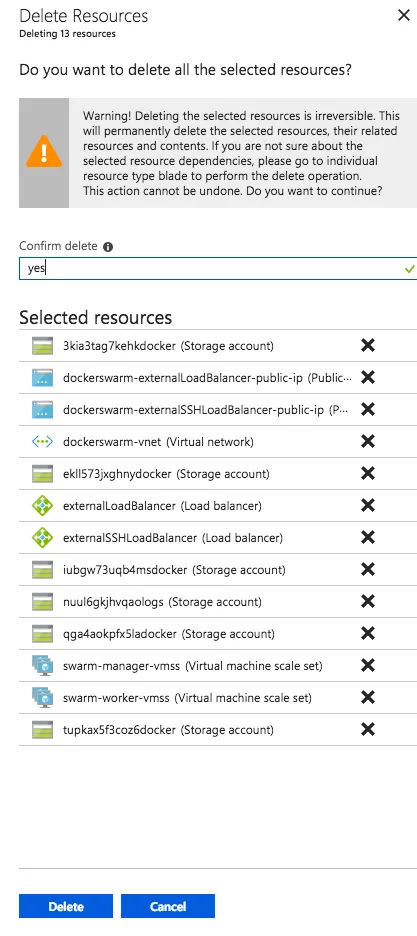
Confirm the resources that you want to remove:
NOTE
Due to some resource dependencies, you might have some resources that can’t be removed until their dependent resources are deleted. This means you will probably need to delete the resources a few times before they will all be removed.
See also
-
Docker for Azure documentation: https://docs.docker.com/docker-for-azure/
-
How to upgrade Docker for Azure: https://docs.docker.com/docker-for-azure/upgrade/
-
Using a persistent datastore: https://docs.docker.com/docker-for-azure/persistent-data-volumes/