Setting Up Paas With Openshift Origin
Platform-as-a-Service ( PaaS ) is a type of cloud service where the consumer controls software deployments and configuration settings for applications (mostly web), and the provider provides servers, networks, and other services to manage those deployments. The provider can be external (public provider) or internal (IT department in an organization). There are many PaaS providers, such as Amazon (https://aws.amazon.com), Heroku (https://www.heroku.com), OpenShift (https://www.openshift.com), and so on. In the recent past, containers seem to have become the natural choice for applications to get deployed to.
Earlier in this chapter, we looked at how we can build a CI/CD solution using Shippable and Heroku, where we deployed our app using the Heroku PaaS. Heroku is a public cloud service, hosted on Amazon Web Service ( AWS ). OpenShift (https://github.com/openshift/origin) is a PaaS that leverages technologies such as Docker and Kubernetes (https://kubernetes.io) among others, providing a complete ecosystem to service your cloud-enabled apps. As we talked about Kubernetes in Chapter 8, Docker Orchestration and Hosting Platform, it is highly recommended you read that first before continuing into this recipe. I am going to borrow some of the concepts from that chapter. Lets look at the following diagram:
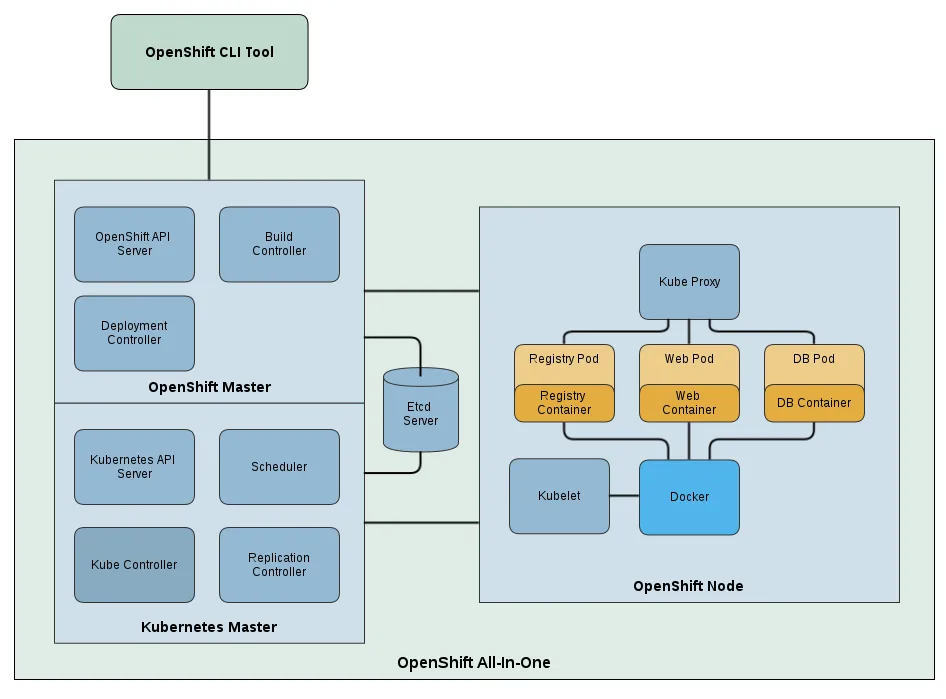
Kubernetes provides container cluster management with features such as scheduling pods and service discovery, but it does not have the concept of a complete application, nor does it build and deploy Docker images from the source code. OpenShift extends the base Kubernetes model and fills those gaps. If we fast-forward and look at Chapter 8, Docker Orchestration and Hosting Platform , for the Kubernetes section, you will notice that to deploy an app, we need to define Pods, Services, and Replication-Controllers. OpenShift tries to abstract all that information and let you define one configuration file that takes care of all the internal wiring. Further, OpenShift provides other features such as automated deployment through source code push, centralized administration and management of applications, authentication, team and project isolation, and resource tracking and limiting, all of which are required for enterprise deployment.
In this recipe, we will set up all-in-one OpenShift Origin on a VM and start a pod. In the next recipe, we will see how to build and deploy an app through source code using the Source-to-image ( S2I ) build feature. The example can be found at https://github.com/openshift/origin/tree/master/examples/sample-app .
Getting ready
Set up a Virtual Machine with CentOS 7.5 and at least 4 GB of RAM, and SSH into it.
- Install Docker:
$ curl https://get.docker.com | bash- Add an entry for an insecure registry to the Docker daemon configuration file (
/etc/docker/daemon.json):
$ cat /etc/docker/daemon.json
{ "insecure-registries": [ "172.30.0.0/16" ] }- Start up Docker:
$ systemctl start docker- Install the
wgetpackage:
$ yum install -y wget- Download the latest OpenShift binaries from the releases page on github (https://github.com/openshift/origin/releases):
$ cd /tmp
$ wget https://github.com/openshift/origin/releases/download/v3.10.0/openshift-origin-client-tools-v3.10.0-dd10d17-linux-64bit.tar.gz- Use
tarto extract the archive and move theocbinary to a directory in your path (/usr/local/bin):
$ tar -xvzf openshift-origin-client-tools-v3.10.0-dd10d17-linux-64bit.tar.gz
$ cd openshift-origin-client-tools-v3.10.0-dd10d17-linux-64bit
$ sudo cp oc /usr/local/bin
$ cd ~
How to do it…
Now that we have a VM set up with Docker running and the OpenShift binaries installed, we can start up our cluster using the oc binary. OpenShift has a web console that you can log into, but in order for it to work correctly, OpenShift will need to be able to determine your IP address. If your VM has more than one, you might need to explicitly tell OpenShift which one to use when starting the cluster. In the example here, my public IP address is 142.93.14.79 ; your IP will be different:
$ oc cluster up --public-hostname=<your ip>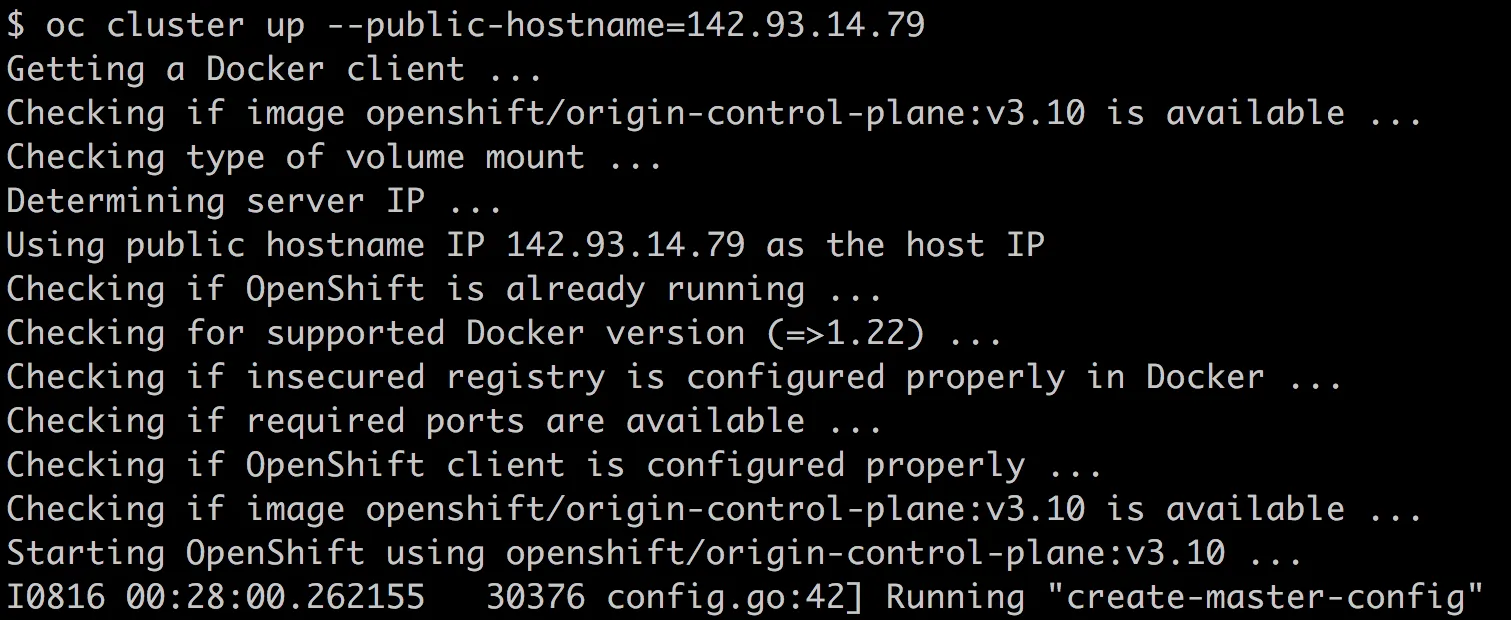
After a few minutes, the cluster is up and running, and you will see something like this:
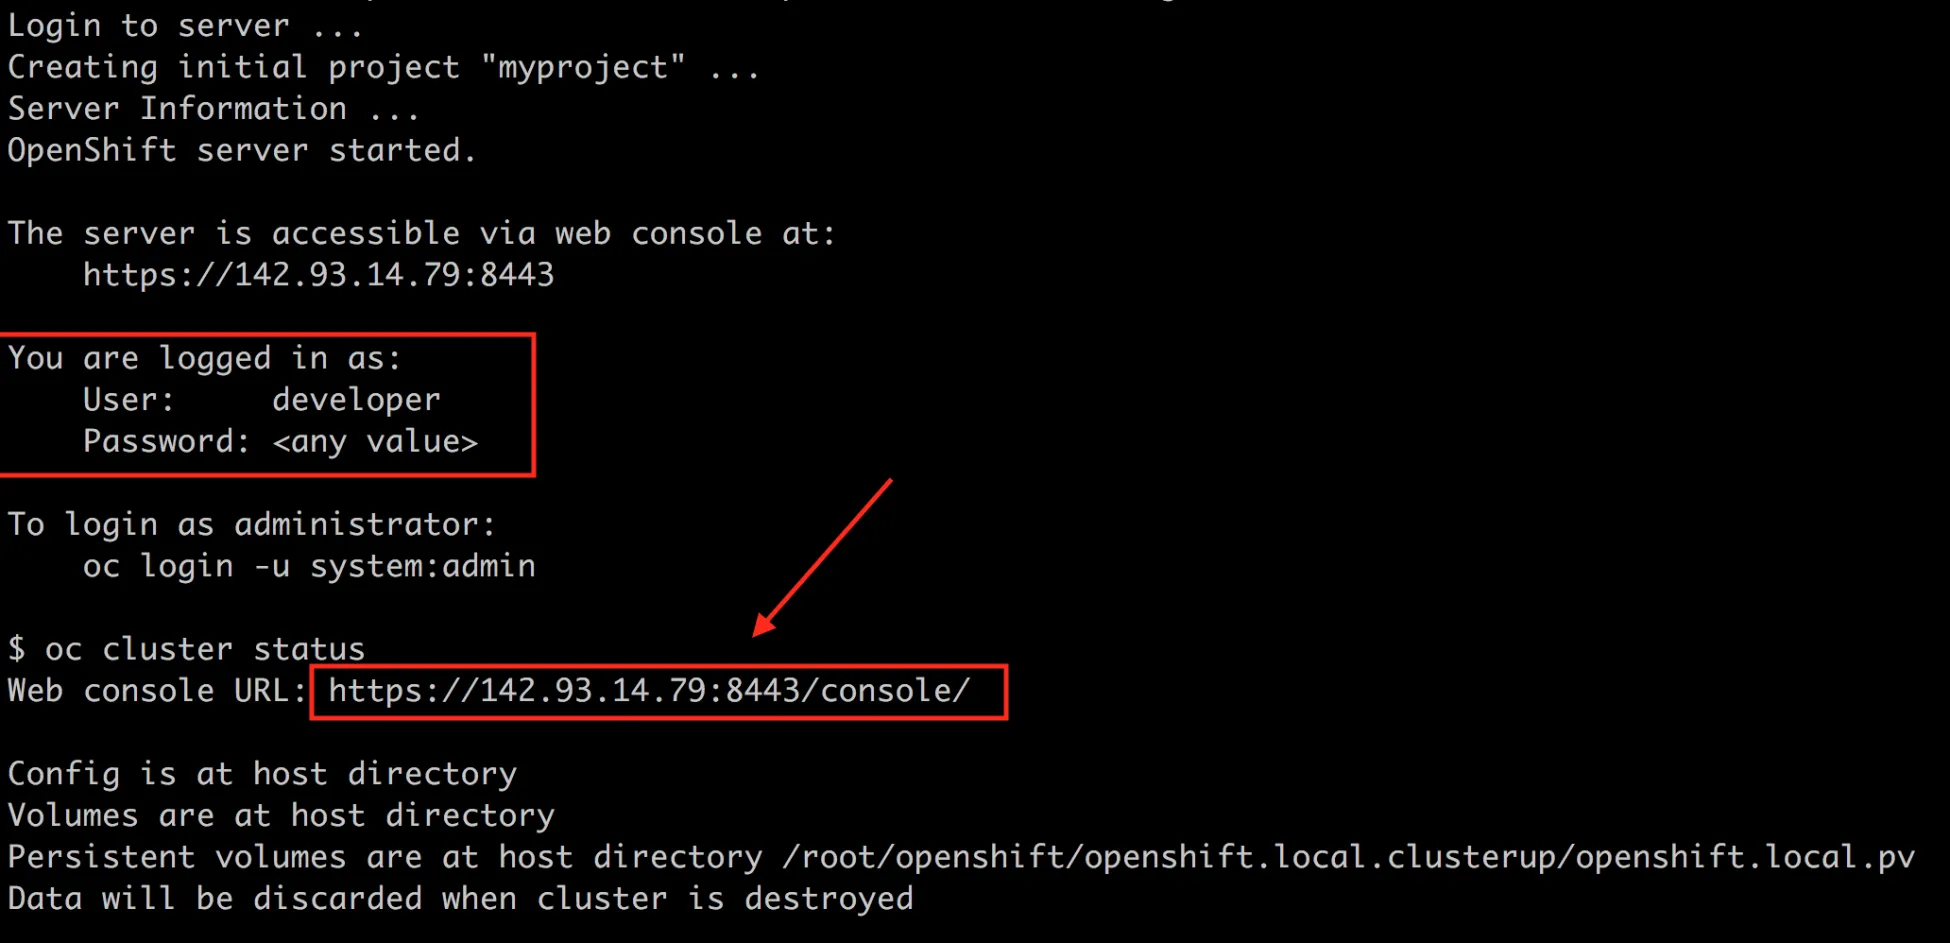
At this point, we have two options; we can either install our application via the SSH shell, or we can use the web console. Let’s try with the web console first, and make sure that is working correctly. Open the web console URL in your browser, and log in using the credentials shown in the output when starting your cluster.
NOTE
You will probably get a warning from your browser that the SSL/TLS certificate doesn’t match. That is fine, and expected; you can bypass this warning and continue.
Now that you are logged in, let’s deploy an example application. Click on the Ruby icon in the catalog:
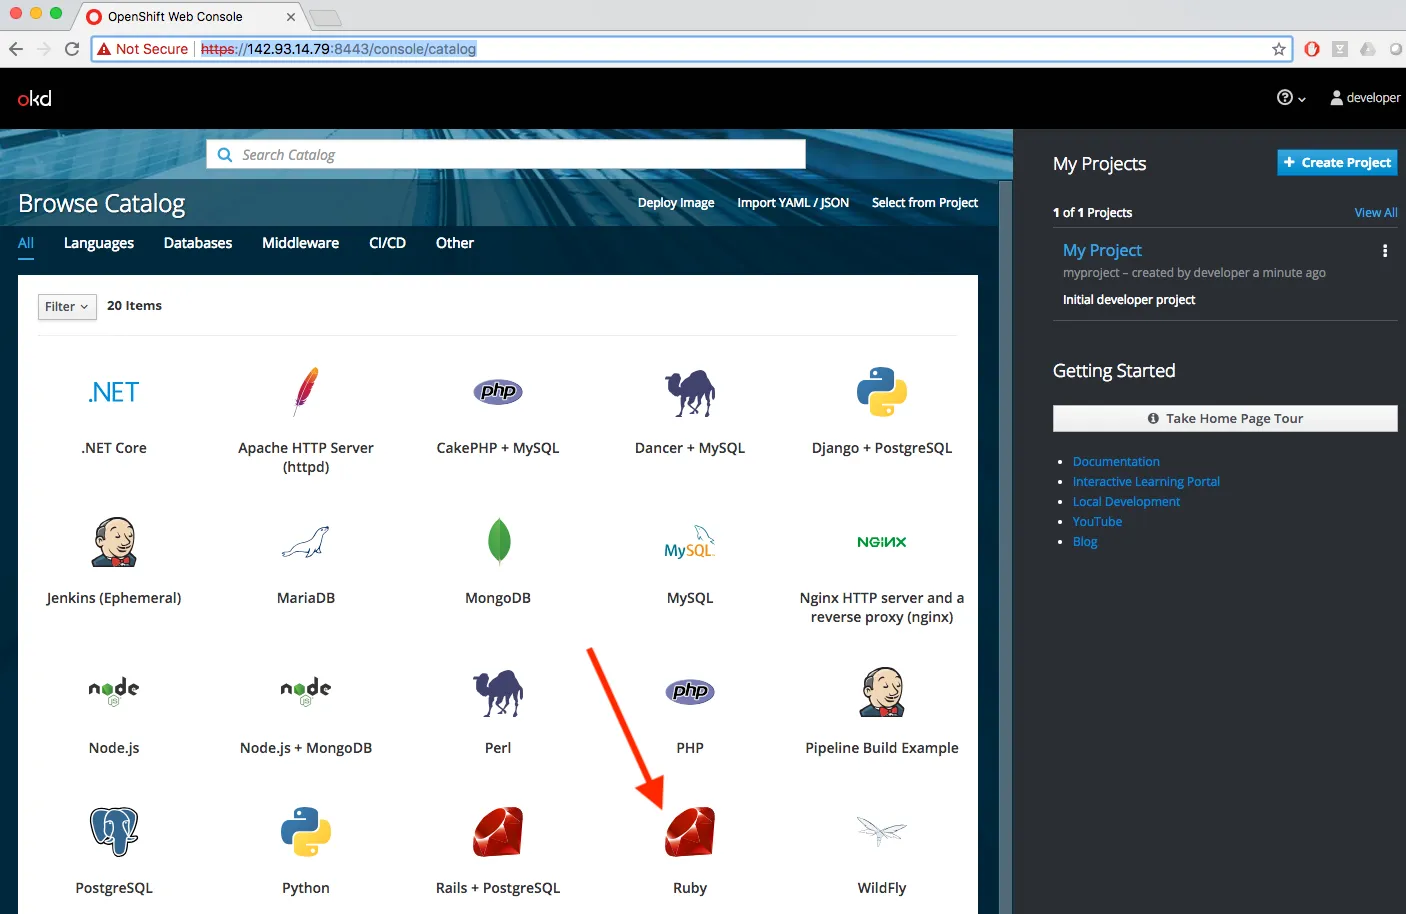
This brings up a wizard, that will help us add our application to the cluster. Click the Next button:
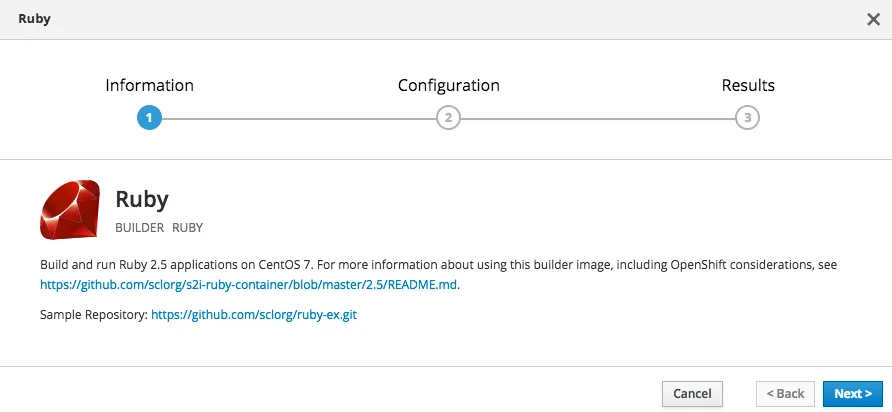
Click the Try Sample Repository link, and it will auto-populate the form for us; then, click the Create button:
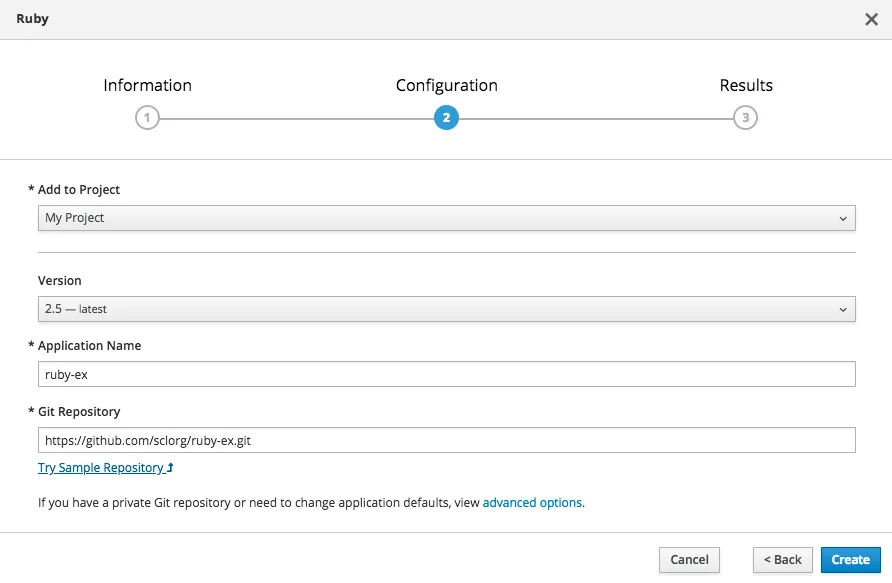
Just like that, our ruby-ex application was created. Click the Close button:
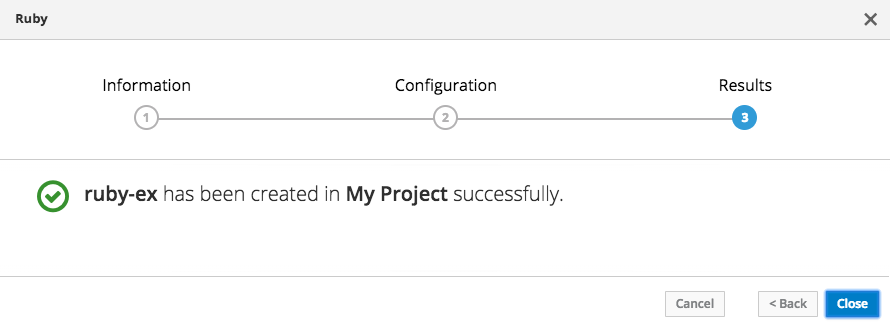
You should now see the application listed in the web console; once the application is up and running, you will watch a URL where you can see the application in action:
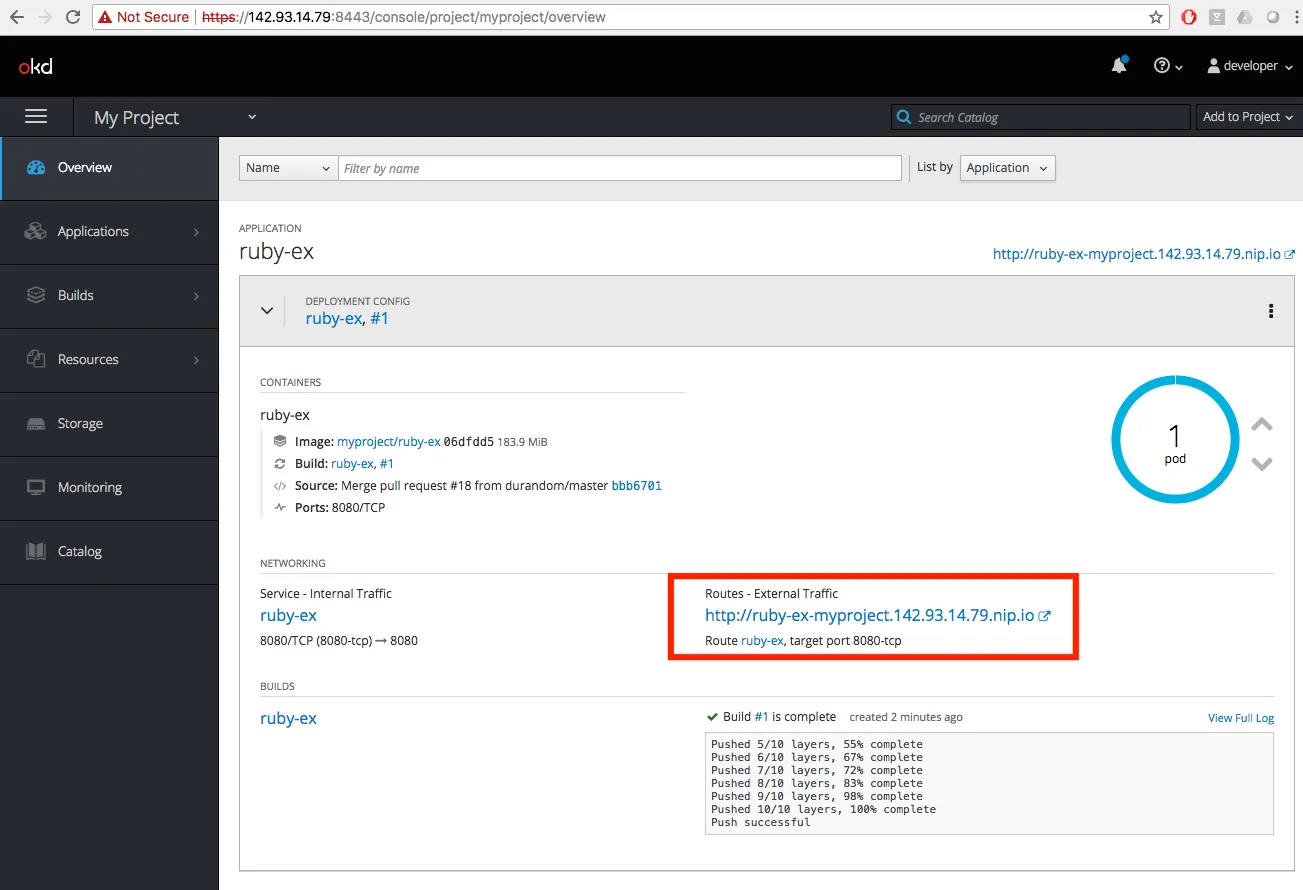
Open the application URL in your browser, and you should see something like the following:
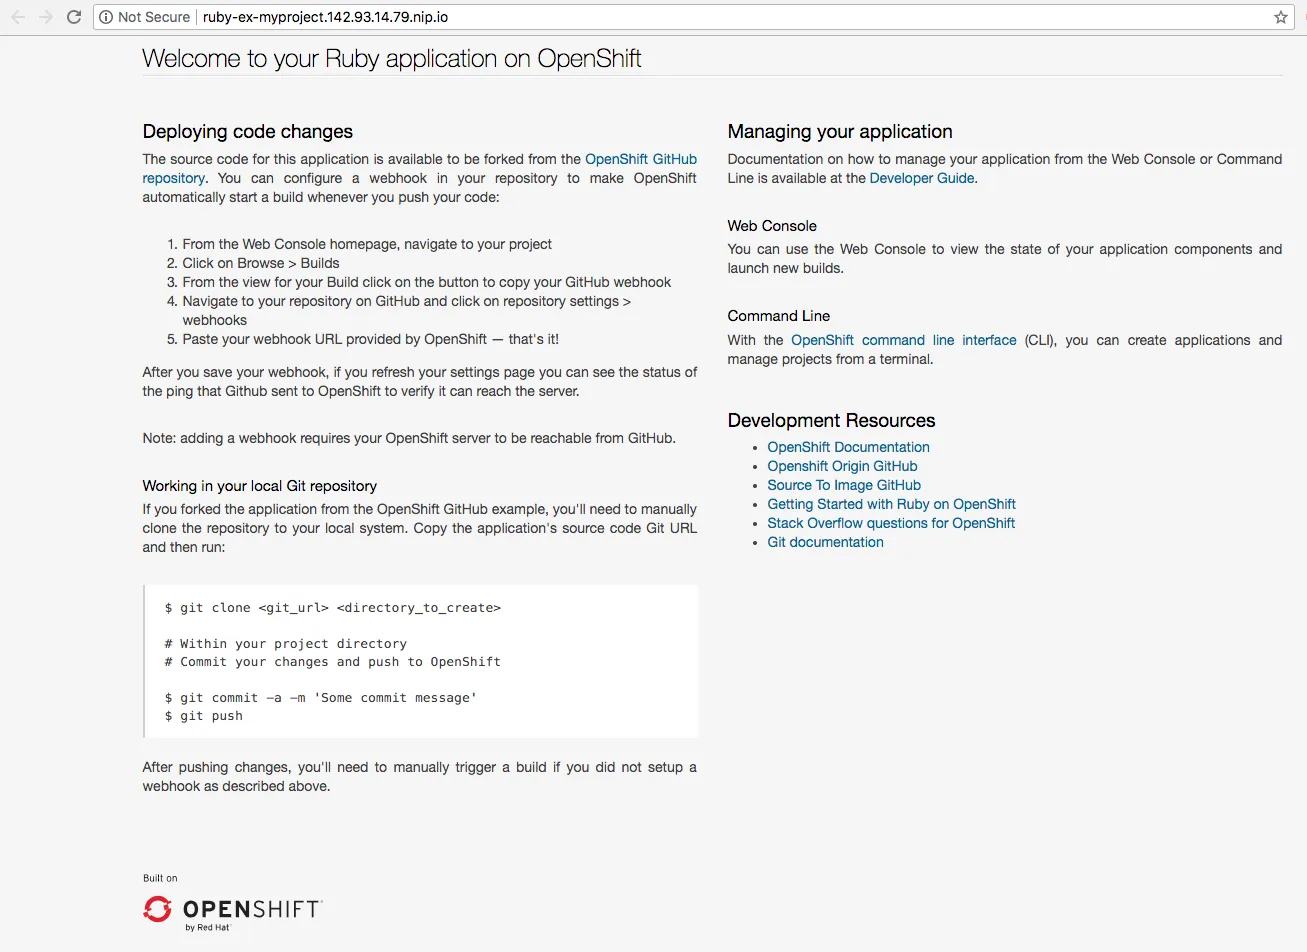
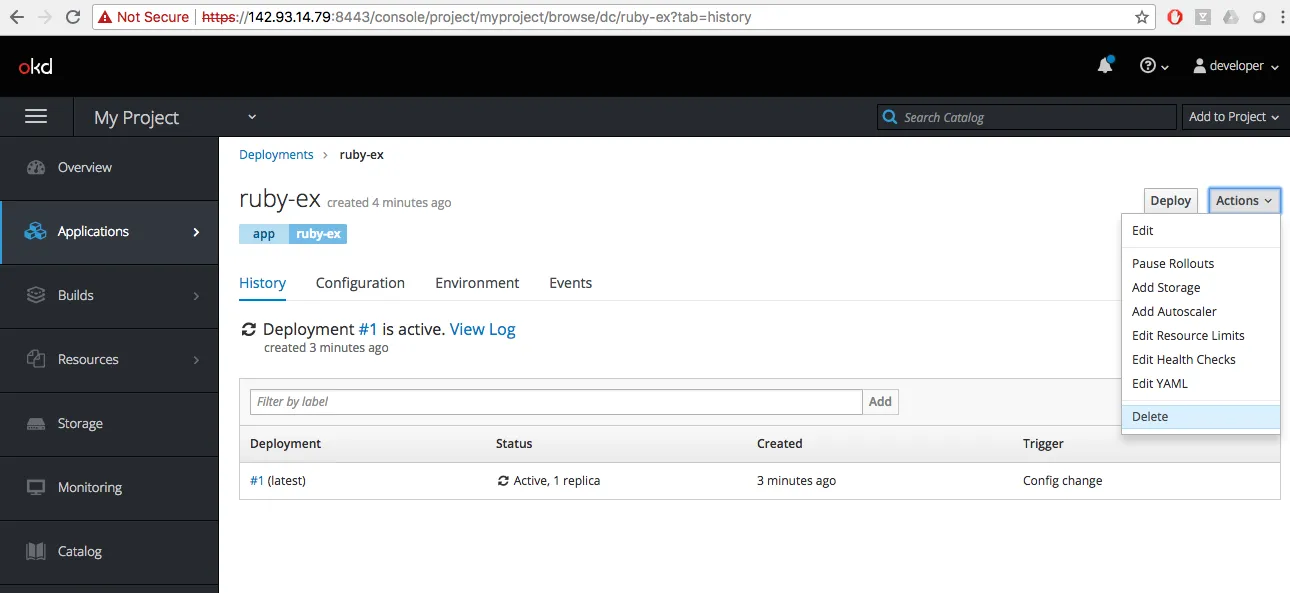
Now that we have the example Ruby application up and running, let’s delete it, and do the same thing, but using the SSH shell. Under applications, you can click the Actions option and select Delete. This will delete the application for us:
Go back to the SSH shell, and let’s create a new application, but this time using the oc binary. For this example, we will be using one of the other built-in examples that comes with OpenShift. We will use the django-psql-persistent example, which has two services, a Django web service and a PostgreSQL database service:
$ oc new-app django-psql-persistent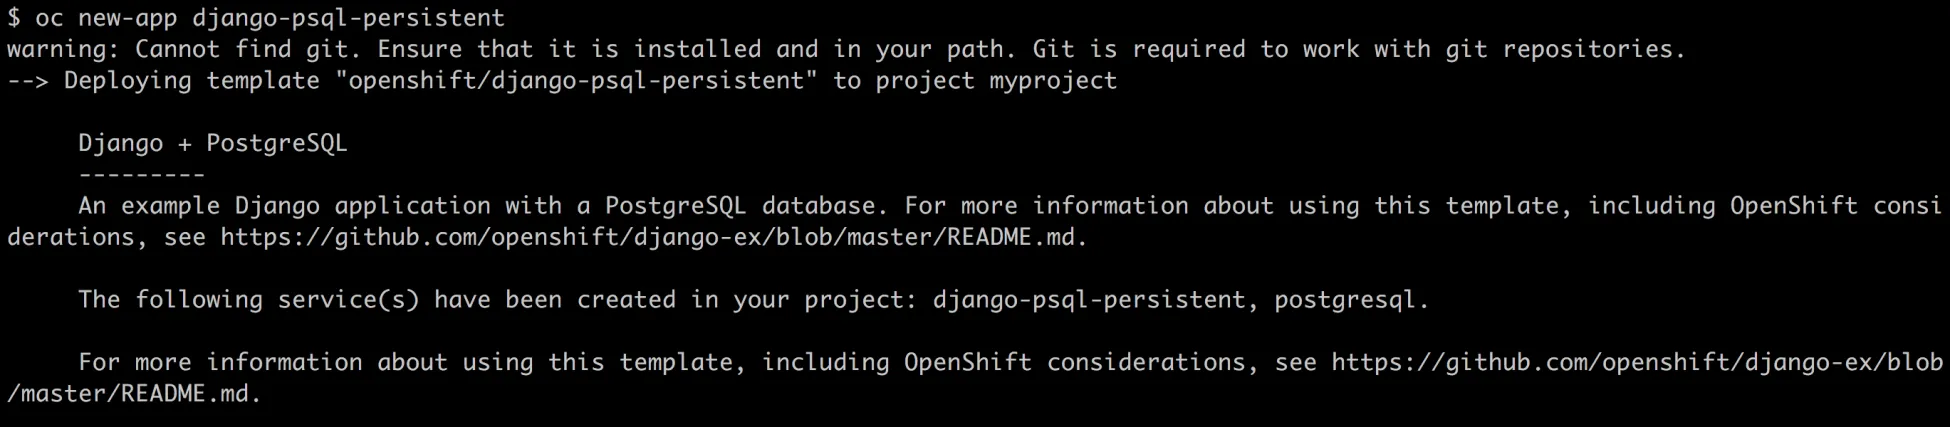
After a few minutes, your application is created, and you should see something like the following:
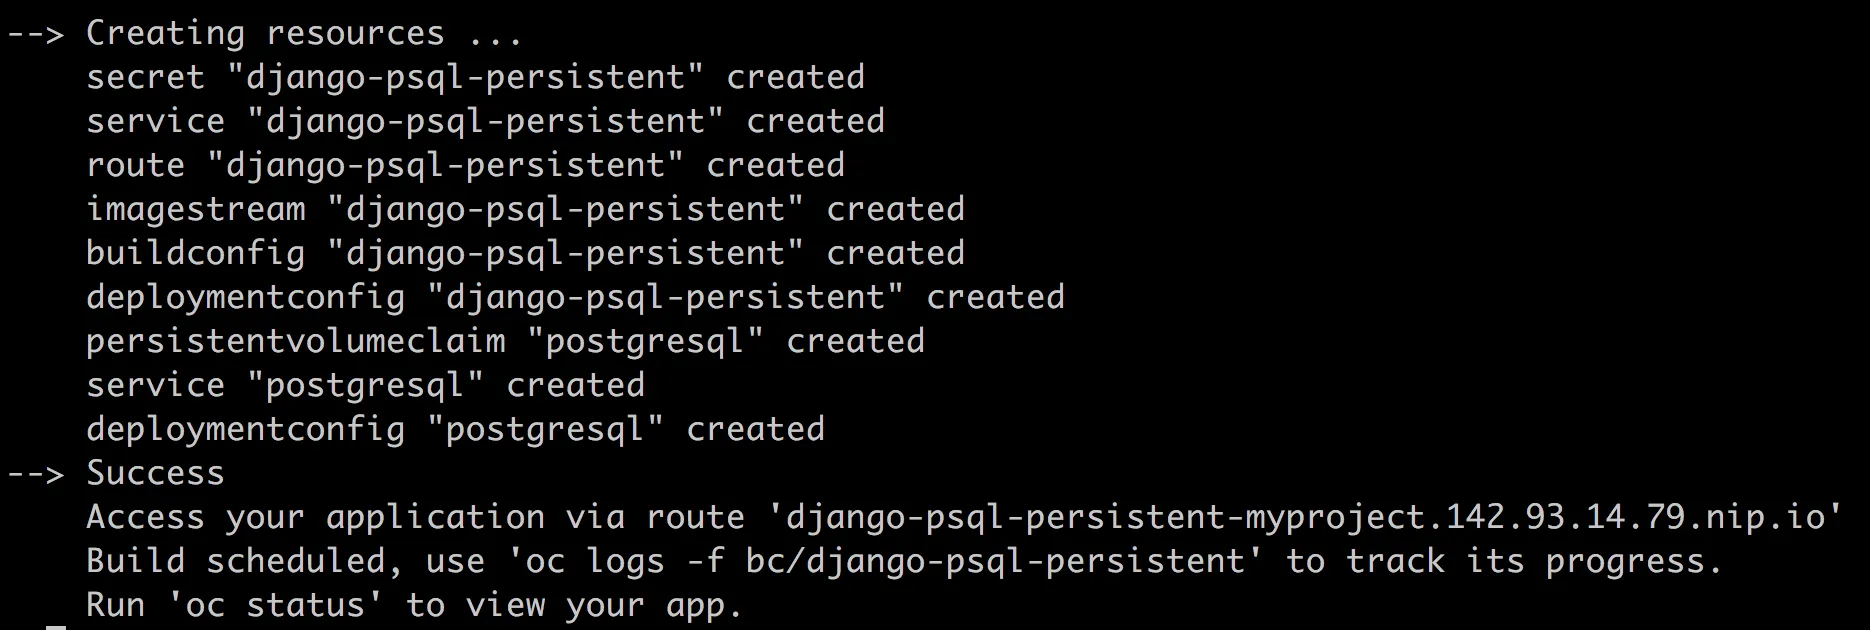
When we run the oc status command, we can see the URL for our project:
$ oc status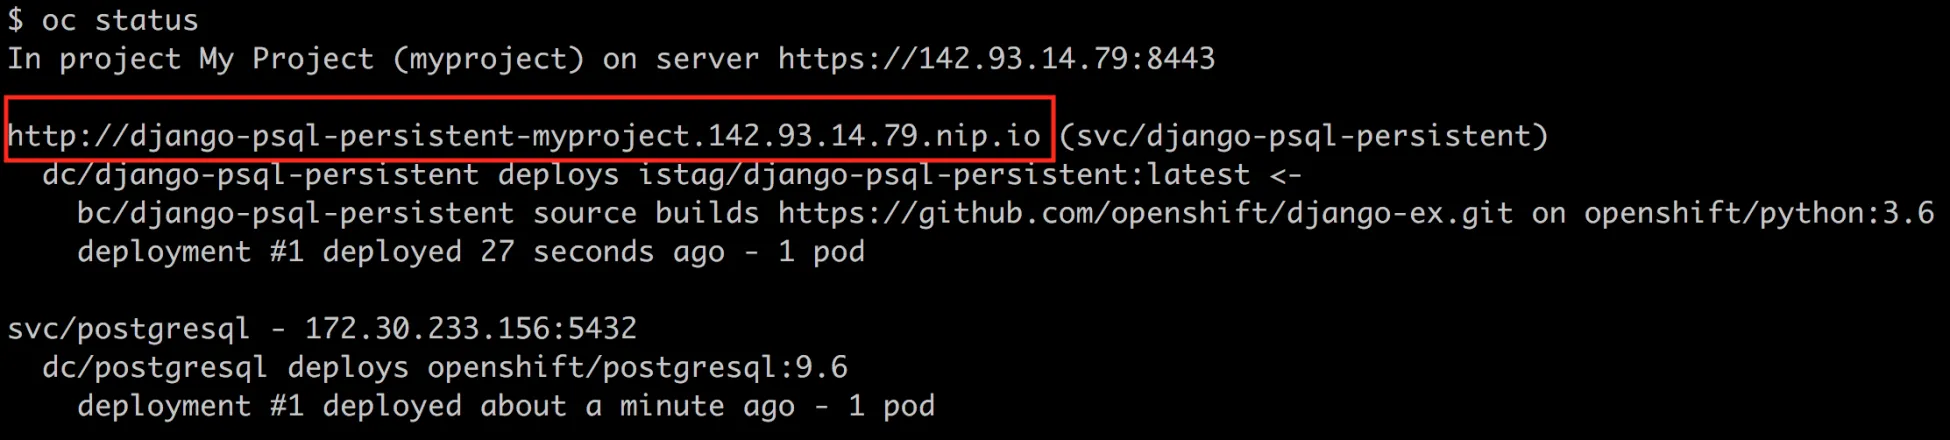
When we open that URL in our browser, you can see the application is up and running:
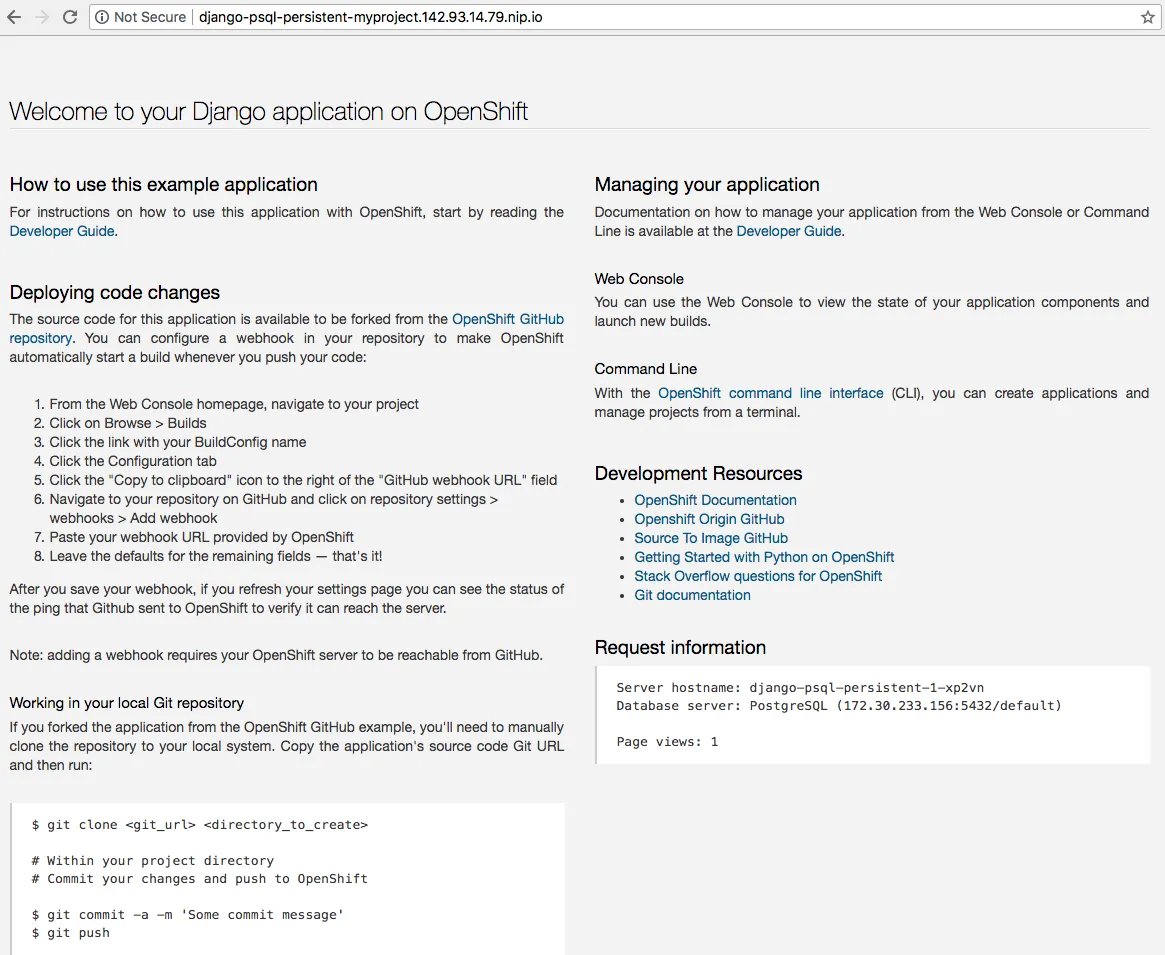
When you go back to the web console, you can see the details of the application you just deployed:
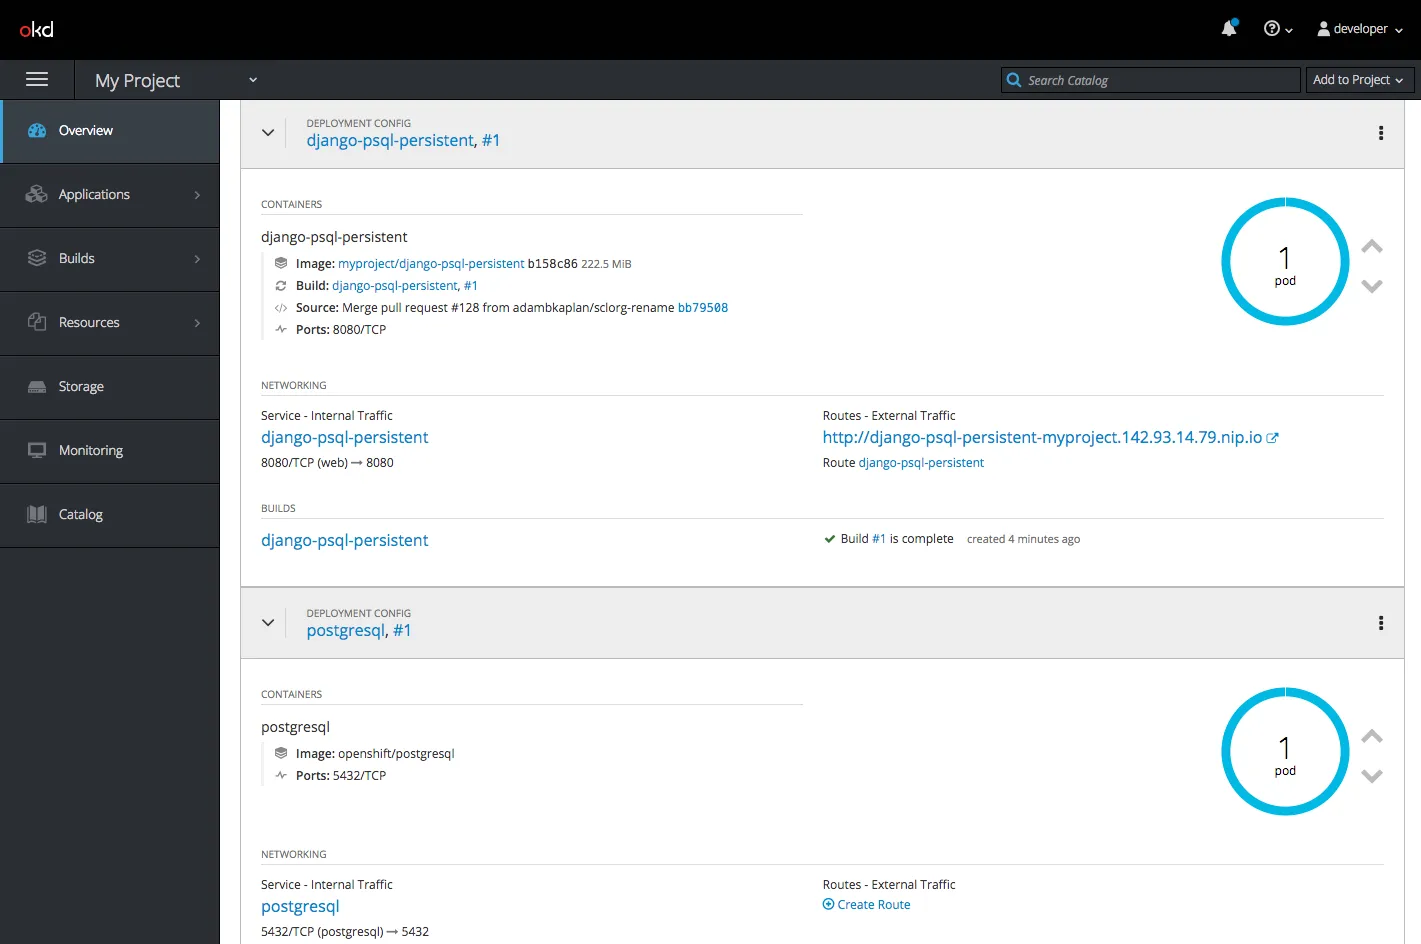
If we want to delete the application using the oc binary, it is pretty easy. We just need to use the delete command:
$ oc delete dc/django/psql-persistent$ oc delete dc/postgresql
How it works…
When OpenShift starts, all Kubernetes services start as well. Then, we connect to the OpenShift master through CLI and request it to start a pod. That request is then forwarded to Kubernetes, which starts the pod. OpenShift acts as the middleman between you and Kubernetes.
There’s more…
-
If you run the
docker container lscommand, you will see the corresponding containers running -
If you want to stop the OpenShift cluster, you can run the following command:
$ oc cluster downSee also
-
The Learn More section on https://github.com/openshift/origin.
-
OpenShift documentation at https://docs.okd.io/latest/welcome/index.html.