Docker For Aws
Amazon Web Services ( AWS ) is the largest and most popular cloud platform available today. AWS provides a few different ways of running Docker workloads on their cloud. You can use Elastic Beanstalk, Elastic Container Service ( ECS ), or Elastic Container Service for Kubernetes ( EKS ). Each of these products have different capabilities, which allow you to do different things. None of these products are Docker native, and require you to learn a new set of tools and libraries in order to get your Docker application up and running.
Docker for AWS uses the same cloud-native tools that these products use, but provides a more Docker-native experience. Once Docker for AWS is set up, you can use the same Docker tools and APIs that you already know about to deploy your Docker workload to AWS.
Getting ready
Before we can install Docker for AWS, you will need to make sure that you have satisfied all of the prerequisites:
-
You will need an active AWS account with either login access to the console, or API keys for making CLI/API calls.
-
Your account will either need to be an admin account, or an account with the correct IAM permissions.
NOTE
For a full list of permissions, look at the documentation at: https://docs.docker.com/docker-for-aws/iam-permissions/.
- SSH keys need to be created and added to your AWS account.
NOTE
See the following Amazon documentation for more information: https://docs.aws.amazon.com/AWSEC2/latest/UserGuide/ec2-key-pairs.html.
How to do it…
Docker for AWS uses CloudFormation for building and configuring your Swarm cluster. There are two ways to deploy a CloudFormation stack: you can do it via the AWS web console, or the AWS Command Line Interface (CLI). Using the web console is going to be easier to get up and running, because all you need to do is fill out a web form. I recommended that approach if you are not familiar with CloudFormation. This is what I’ll be showing you here.
We are going to deploy the latest available stable version, and let Docker for AWS build a new Virtual Private Cloud ( VPC ) for us. There is another option where we can install it on an existing VPC, but that is out of the scope of this recipe.
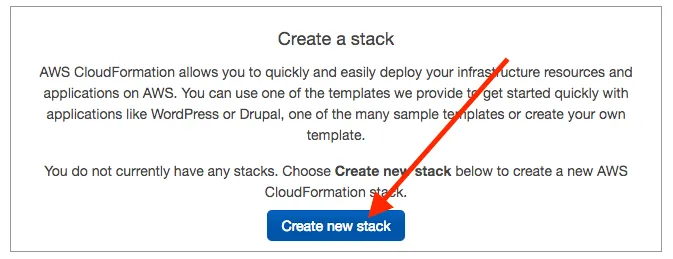
- Log in to the AWS console and go to the CloudFormation section. Then, click on the Create new stack button:
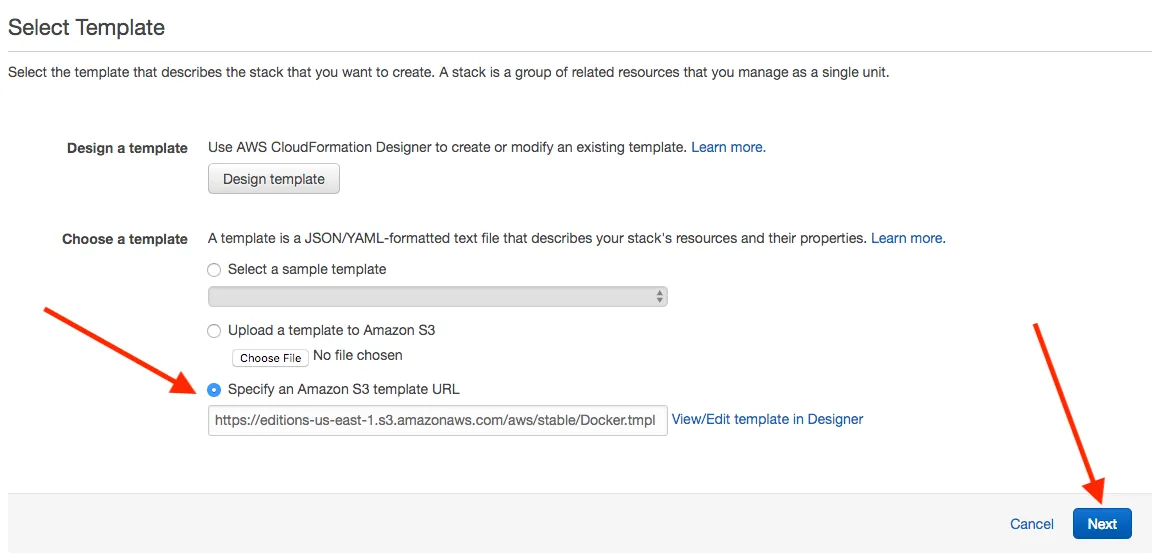
- Under Choose a template, select the Specify an Amazon S3 template URL radio button, enter the following URL, and click Next: https://editions-us-east-1.s3.amazonaws.com/aws/stable/Docker.tmpl:
- Fill out the form, as shown in the following screenshot:
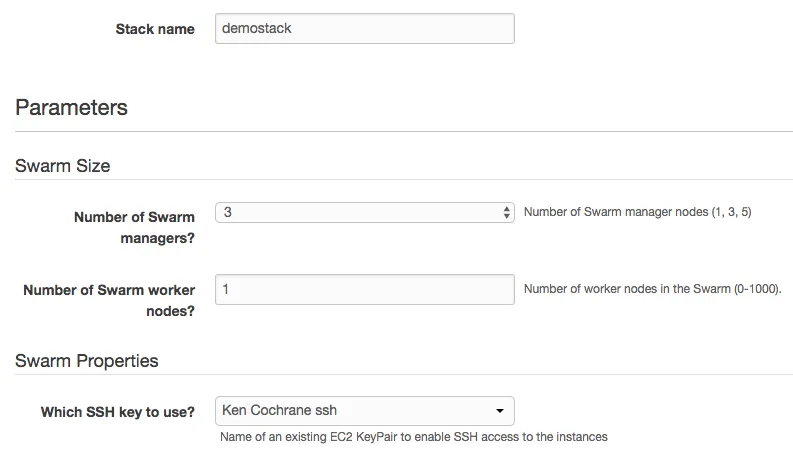
The rest you can change, or leave as the default values.
-
Hit the Next button.
-
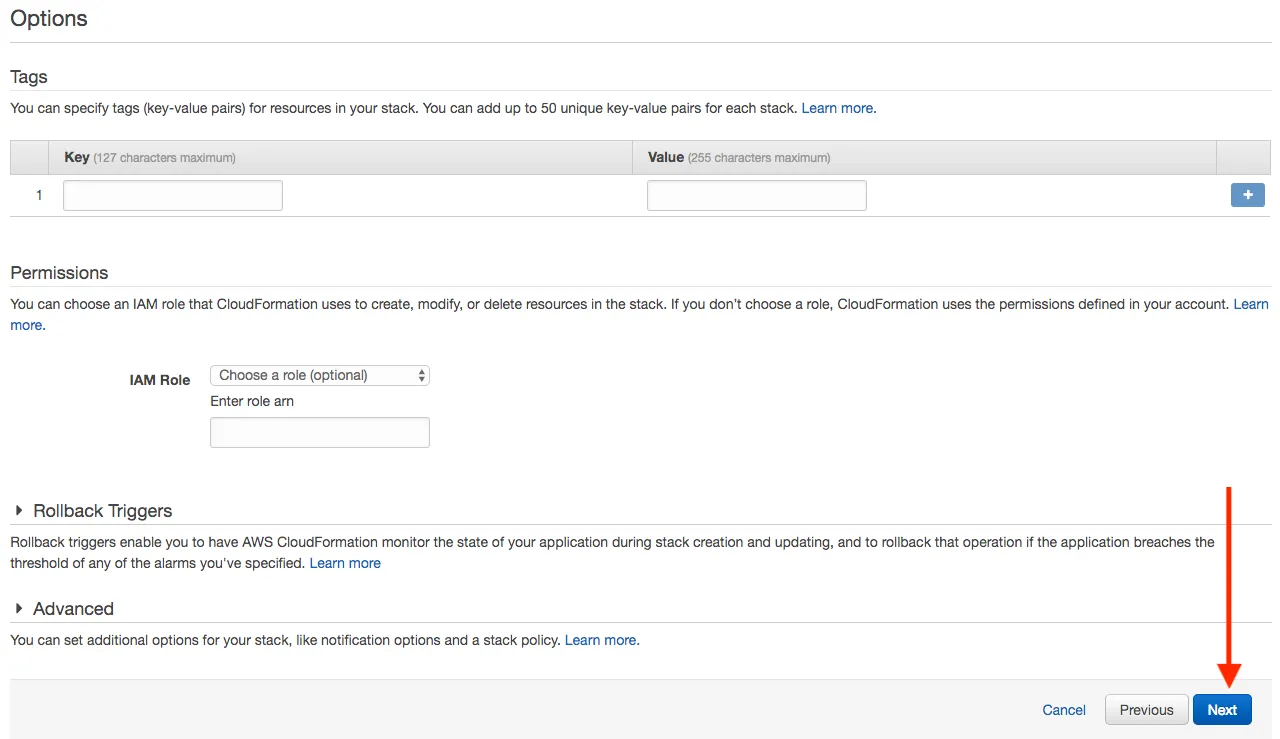
Add any optional tags if you want to, otherwise, feel free to leave everything as it is and hit the Next button:
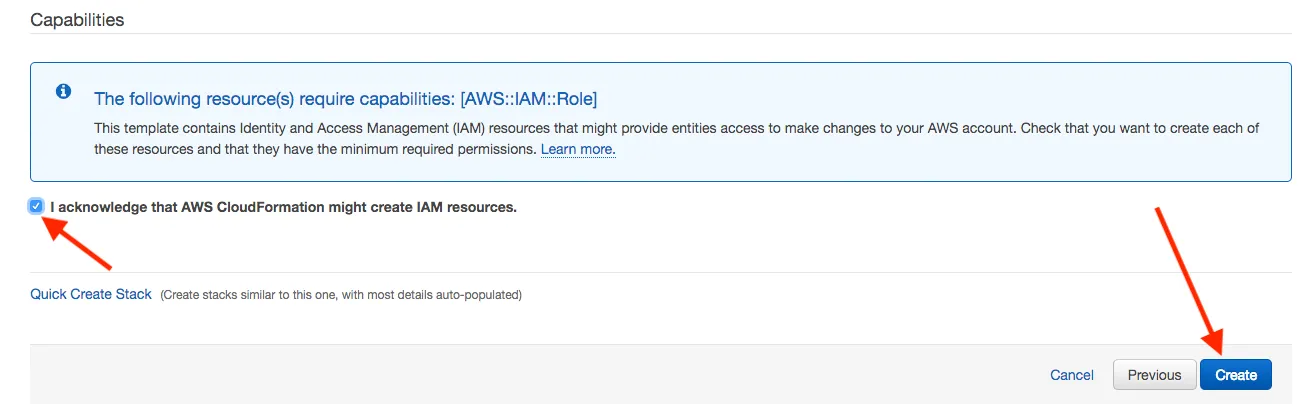
- Click the I acknowledge that AWS CloudFormation might create IAM resources checkbox, and hit the Create button:
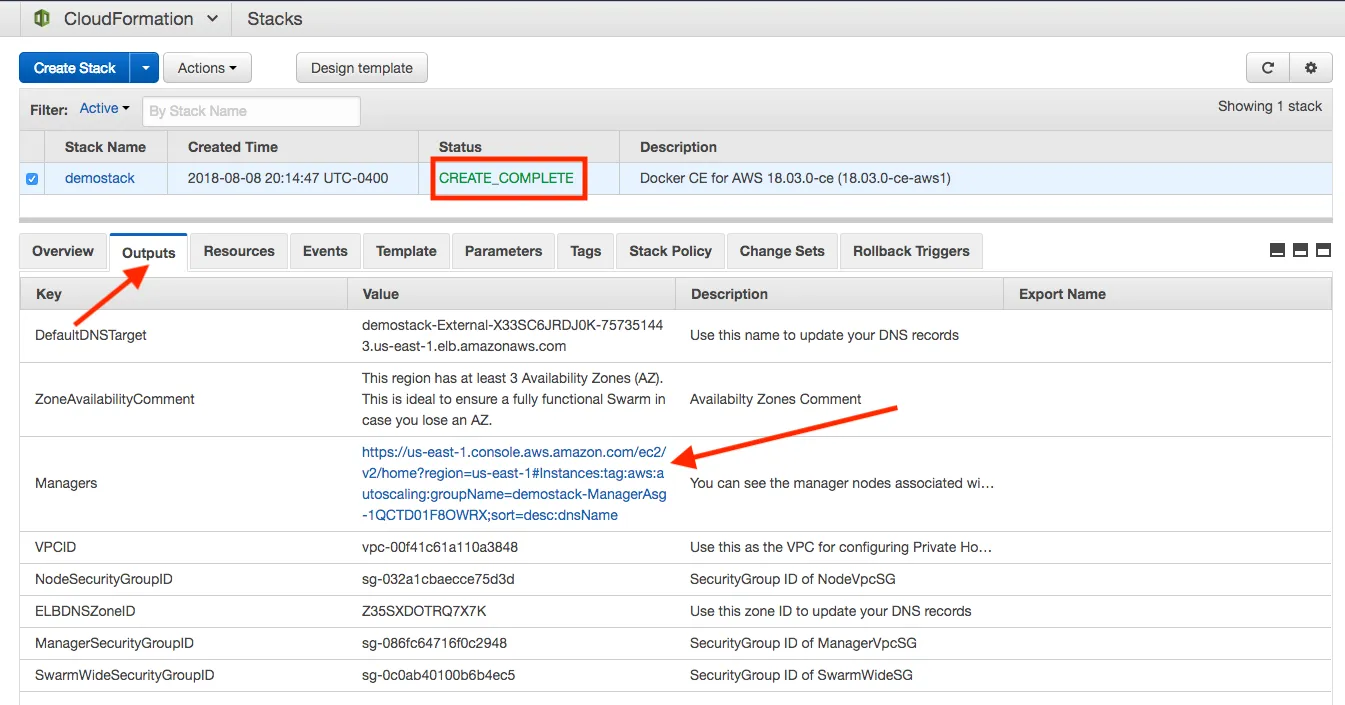
- It will take a few minutes to create your stack, and when it is completes, you should go to the Outputs tab and click on the link next to Managers:
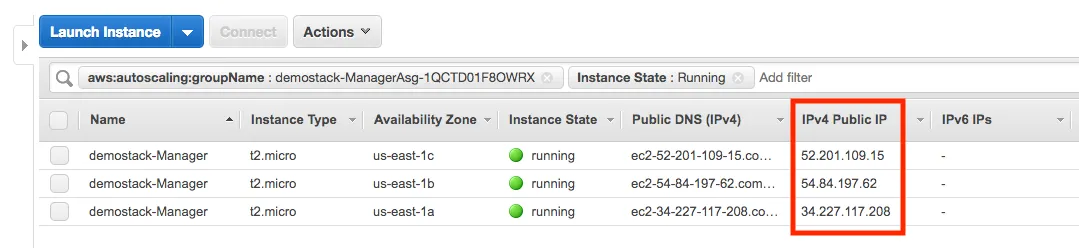
- Pick one of the Public IP addresses for one of the managers:
SSH into one of the manager nodes, like so:
$ ssh docker@52.201.109.15
$ docker node ls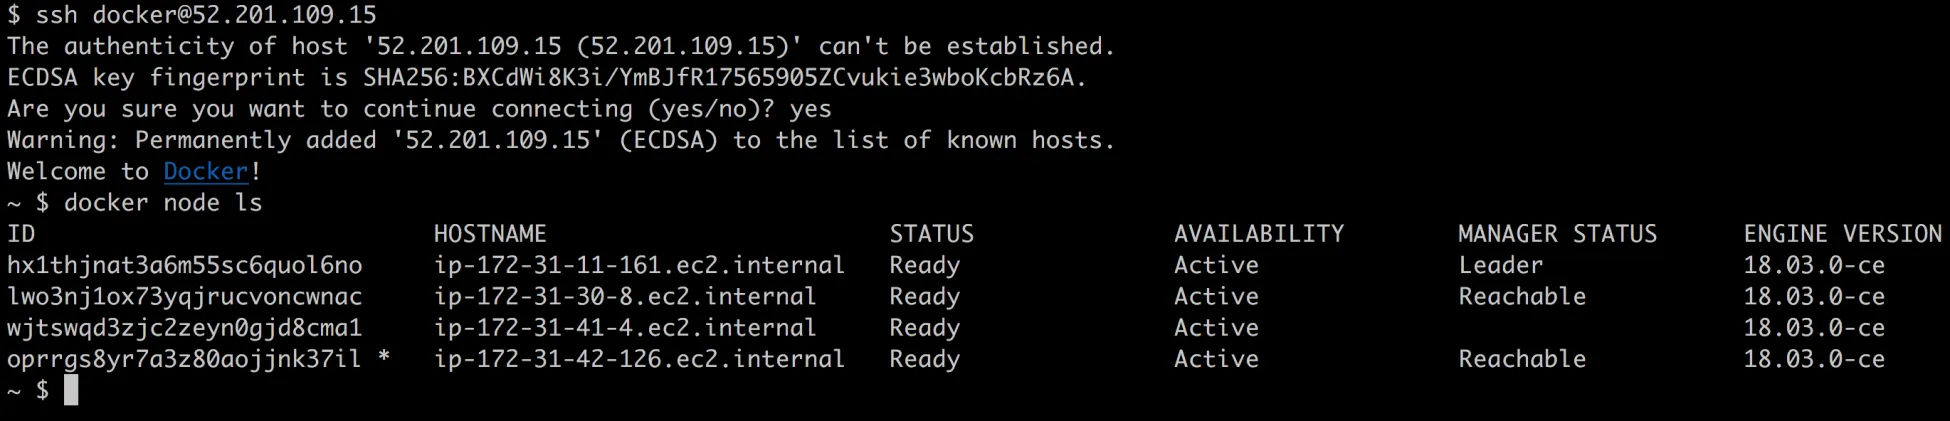
NOTE
When you SSH into the swarm manager, you are not actually logging in to the EC2 host directly – you are logging in to a special SSH container that is running on that host.
Docker for AWS is now ready to use.
How it works…
CloudFormation will take the information that we provided in the form, and it will build a new Virtual Private Cloud ( VPC ), subnets, internet gateway, routing tables, security groups, Elastic Load Balancer ( ELB ), and two EC2 AutoScaling Groups (ASG) – one ASG for the managers and one for the workers. The manager nodes in the manager ASG will create new EC2 instances with Docker installed on them. The manager instances will then create a new Docker Swarm and join together to form a manager quorum.
Once the manager nodes are up and running, the worker ASG will start up worker EC2 instances with Docker on them, and they will also join the same Swarm and start accepting tasks. After all of these steps are complete, the Swarm is ready for action.
There’s more
Getting Docker for AWS up and running is only half the battle. Now that it is running, you will need to deploy an application, which we will show you in the next recipe. In the meantime, here are a few common tasks that you should know how to do:
- Scaling more workers : If you want to change the number of workers that you have in your Swarm cluster, you can do this by updating the CloudFormation stack.
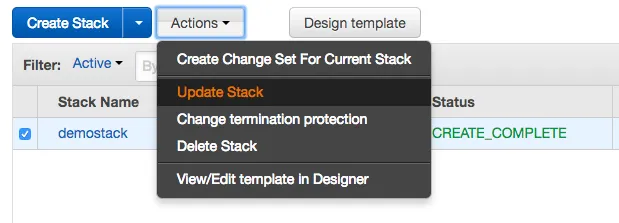
Go to the CloudFormation management page and click the checkbox next to the stack you want to update. Then, click on the Actions button at the top and select Update Stack:
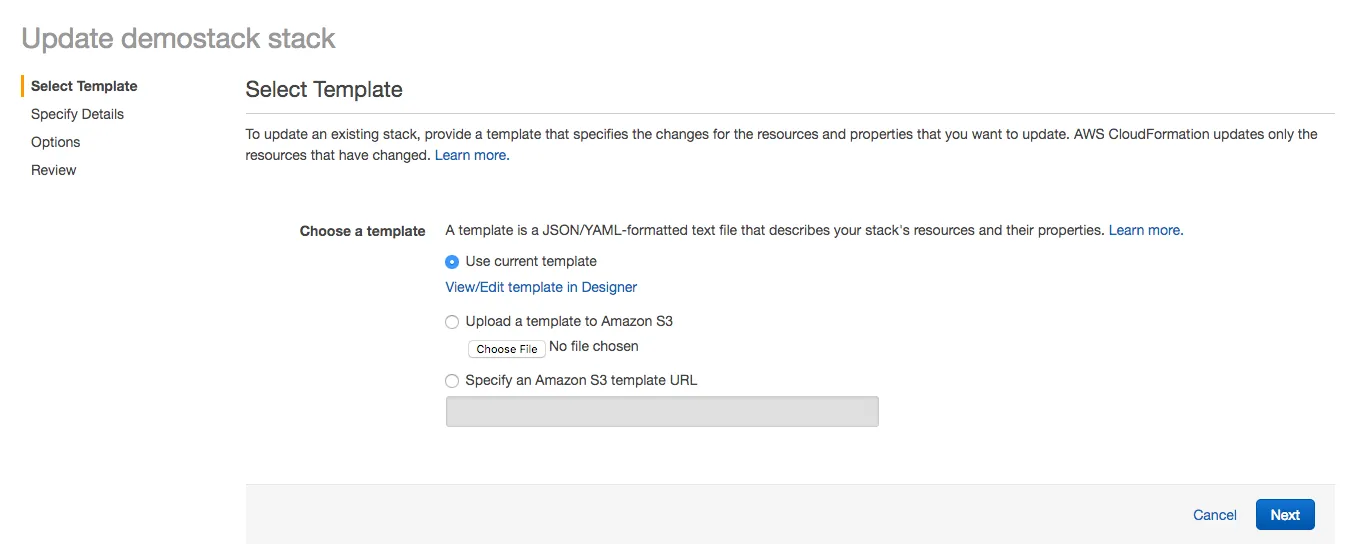
Pick Use current template, and then click Next:
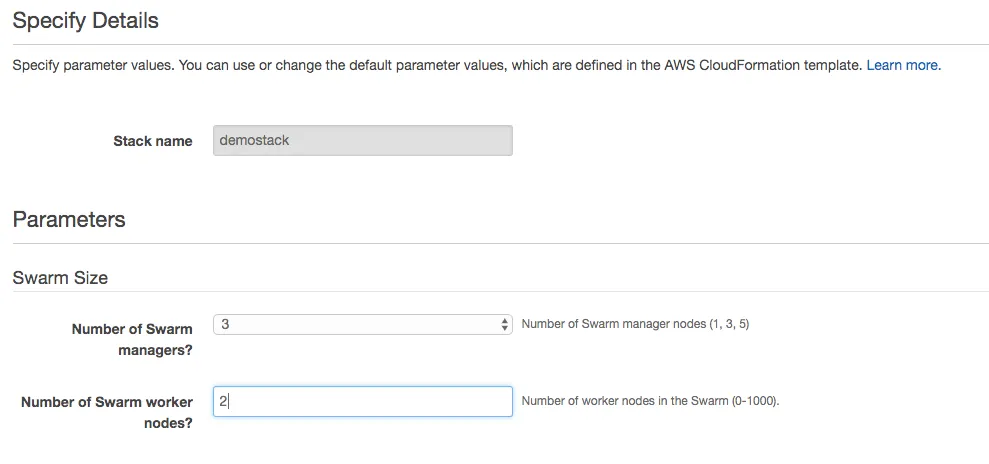
Fill out the same parameters you specified previously, but this time, change your worker count to the new count, and click Next:
On the last page, it will let you preview your changes. If they look good, select the checkbox and click the Update button:
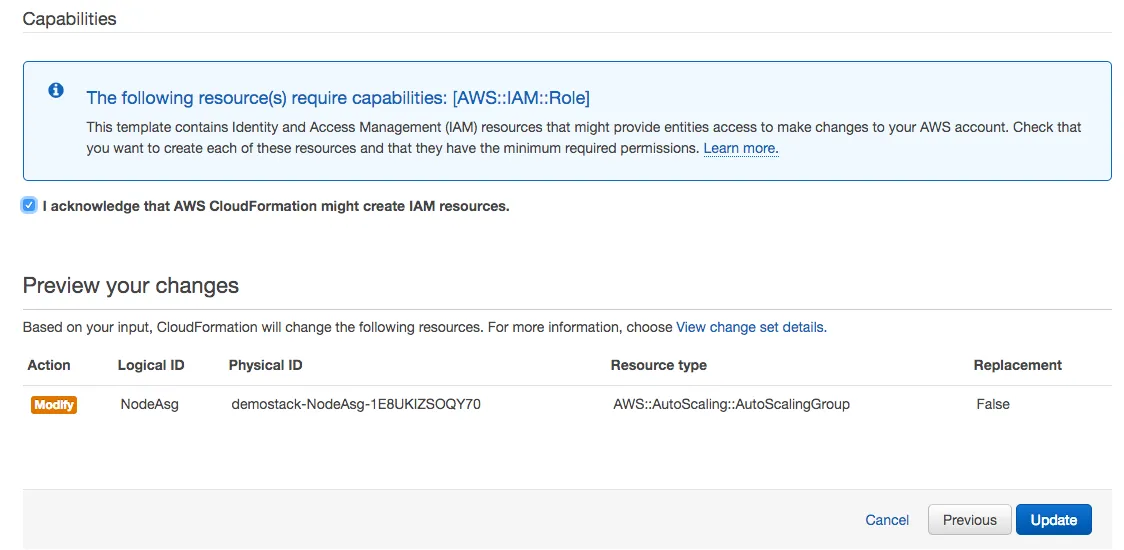
CloudFormation will then update the worker ASG setting and scale the number of worker nodes appropriately. To confirm that the nodes are up and have successfully joined the Swarm, you can log in to a Manager node and run the following command:
$ docker node lsDeleting the Stack :Go to the CloudFormation management page and click the checkbox next to the stack you want to delete. Then, click on the Actions button at the top and select Delete Stack:
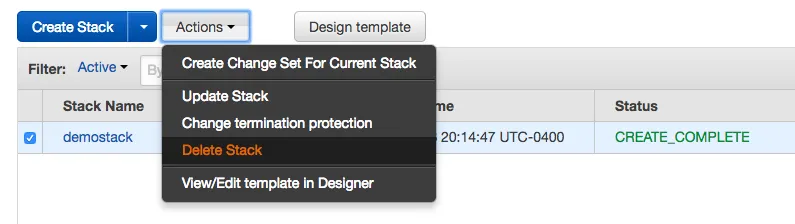
CloudFormation will then remove all of the items in your stack, including any services you had running on your Swarm.
See also
-
Docker for AWS documentation: https://docs.docker.com/docker-for-aws/
-
How to upgrade Docker for AWS: https://docs.docker.com/docker-for-aws/upgrade/
-
Using a persistent datastore: https://docs.docker.com/docker-for-aws/persistent-data-volumes/